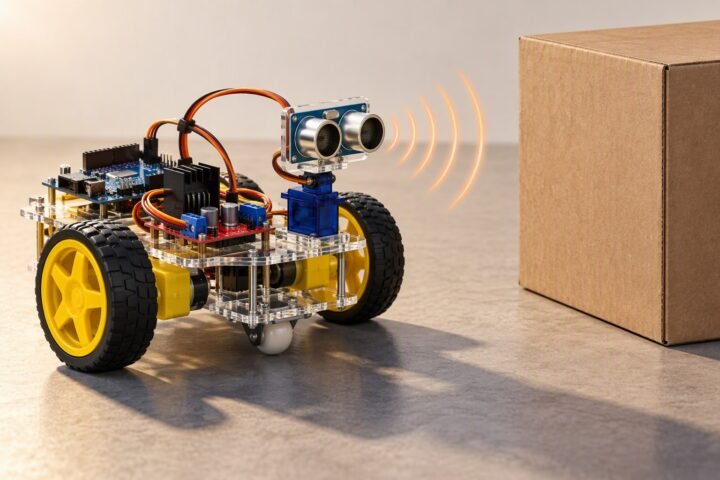
A ₹1,350 bump-switch robot that feels its way around with whiskers. Two lever microswitches sit at the front corners. When one is pressed by a wall or a chair leg, the robot backs up and turns away from that side. There is no distance sensor to fool, so it works on glass, black surfaces and soft obstacles that confuse ultrasonic and infrared sensors. The page includes the pin map, a complete sketch with a stuck-in-a-corner escape, and a test plan.
Scope: beginner. This is a design worksheet with illustrative costs. It has not been bench-tested by this site. It touches the obstacle before it reacts, so keep the speed low and the robot light. It is the best first lesson in contact sensing, and a useful backup layer on a robot that also has a distance sensor.
How it behaves
Each switch connects its pin to ground when pressed, and the Uno’s internal pull-up resistor holds the pin high otherwise, so no extra resistors are needed. The robot drives forward until a switch reads low. It then stops, reverses for a short timed step and turns away from the pressed side. If both switches are pressed together it treats that as a head-on hit and turns the full way around. A counter spots repeated bumps in a short time and runs a longer escape turn, because a robot in a corner can otherwise bounce between two walls for ever.
Bill of materials
| Part | Qty | Unit | Total |
|---|---|---|---|
| Arduino Uno R3 | 1 | ₹520 | ₹520 |
| L298N motor driver | 1 | ₹180 | ₹180 |
| Lever microswitch | 2 | ₹15 | ₹30 |
| TT gear motor with wheel | 2 | ₹110 | ₹220 |
| Acrylic chassis | 1 | ₹80 | ₹80 |
| 2×18650 holder with cells | 1 | ₹200 | ₹200 |
| Caster wheel and screws | 1 | ₹40 | ₹40 |
| Jumper wire set | 1 | ₹50 | ₹50 |
| Switch | 1 | ₹30 | ₹30 |
| Parts total | ₹1,350 | ||
Scroll the table sideways to see every column.
Prices checked Nov 2026. Shipping and tools are not included.
Prices are illustrative figures for Indian sellers in November 2026, before shipping, and have not been checked against current listings. Lever microswitches are sold in packs, so you will have spares.
Pin map
| Part | Arduino Uno | Note |
|---|---|---|
| Left microswitch | D2 | Between the pin and GND; uses the internal pull-up |
| Right microswitch | D4 | Between the pin and GND; uses the internal pull-up |
| L298N IN1 / IN2 | D5 / D6 | Left motor direction |
| L298N IN3 / IN4 | D12 / D13 | Right motor direction |
| L298N ENA / ENB | D3 / D11 | PWM speed. Remove the onboard jumpers. |
| L298N +5V | 5V pin | Powers the Uno from the driver’s regulator |
| All grounds | Common GND | Battery, L298N, Uno and both switches |
Mounting the whiskers
- Fix each microswitch at a front corner so the lever sticks out ahead of the chassis by a few centimetres and angles slightly outward.
- Extend a short lever with a stiff wire or a strip of plastic if you want more reach. A longer lever gives the robot more time to stop, but is easier to catch on things.
- Check by hand that a light touch on the lever closes the switch, and that the lever springs back.
- Tidy the switch wires so they cannot be caught by a wheel or the lever.
The sketch
// Bump-switch robot: Uno + L298N + 2 lever microswitches
// Design worksheet: tune the timings on your own chassis.

const int LEFT_SWITCH = 2;
const int RIGHT_SWITCH = 4;

const int IN1 = 5;
const int IN2 = 6;
const int IN3 = 12;
const int IN4 = 13;
const int ENA = 3;
const int ENB = 11;

const int SPEED = 130;
const int TURN_SPEED = 140;
const unsigned long BACK_MS = 350;
const unsigned long TURN_MS = 450;
const unsigned long WINDOW_MS = 4000;   // bumps inside this window count as "stuck"

int recentBumps = 0;
unsigned long windowStart = 0;

void setup() {
  pinMode(LEFT_SWITCH, INPUT_PULLUP);
  pinMode(RIGHT_SWITCH, INPUT_PULLUP);
  pinMode(IN1, OUTPUT);
  pinMode(IN2, OUTPUT);
  pinMode(IN3, OUTPUT);
  pinMode(IN4, OUTPUT);
  pinMode(ENA, OUTPUT);
  pinMode(ENB, OUTPUT);
  stopMotors();
  delay(1500);
  windowStart = millis();
}

void loop() {
  bool leftHit = digitalRead(LEFT_SWITCH) == LOW;
  bool rightHit = digitalRead(RIGHT_SWITCH) == LOW;

  if (!leftHit && !rightHit) {
    forward();
    return;
  }

  stopMotors();
  delay(80);

  if (millis() - windowStart > WINDOW_MS) {
    windowStart = millis();
    recentBumps = 0;
  }
  recentBumps++;

  backward();
  delay(BACK_MS);

  unsigned long turnTime = TURN_MS;
  if (leftHit && rightHit) {
    turnTime = TURN_MS * 2;           // head-on: turn further
  }
  if (recentBumps >= 3) {
    turnTime = TURN_MS * 3;           // repeated bumps: likely a corner
    recentBumps = 0;
  }

  if (leftHit && !rightHit) {
    turnRight();
  } else {
    turnLeft();
  }
  delay(turnTime);
  stopMotors();
  delay(80);
}

void forward() {
  digitalWrite(IN1, HIGH);
  digitalWrite(IN2, LOW);
  digitalWrite(IN3, HIGH);
  digitalWrite(IN4, LOW);
  analogWrite(ENA, SPEED);
  analogWrite(ENB, SPEED);
}

void backward() {
  digitalWrite(IN1, LOW);
  digitalWrite(IN2, HIGH);
  digitalWrite(IN3, LOW);
  digitalWrite(IN4, HIGH);
  analogWrite(ENA, SPEED);
  analogWrite(ENB, SPEED);
}

void turnLeft() {
  digitalWrite(IN1, LOW);
  digitalWrite(IN2, HIGH);
  digitalWrite(IN3, HIGH);
  digitalWrite(IN4, LOW);
  analogWrite(ENA, TURN_SPEED);
  analogWrite(ENB, TURN_SPEED);
}

void turnRight() {
  digitalWrite(IN1, HIGH);
  digitalWrite(IN2, LOW);
  digitalWrite(IN3, LOW);
  digitalWrite(IN4, HIGH);
  analogWrite(ENA, TURN_SPEED);
  analogWrite(ENB, TURN_SPEED);
}

void stopMotors() {
  digitalWrite(IN1, LOW);
  digitalWrite(IN2, LOW);
  digitalWrite(IN3, LOW);
  digitalWrite(IN4, LOW);
  analogWrite(ENA, 0);
  analogWrite(ENB, 0);
}
The sketch reads the switches directly and uses blocking delays, which is fine for a robot that does one thing at a time. Contact switches bounce for a few milliseconds; the 80 ms stop before reacting absorbs that. If a left hit makes the robot turn left instead of away, swap the two turn calls or the motor leads.
Test plan
- Switch check: with the motors disconnected, press each lever and watch a test print show the pin go low. Confirm the lever returns cleanly.
- Motor direction: confirm forward, backward and both turns with the wheels off the ground.
- Wall hit: drive head-on at a wall, then at a shallow angle. Record which switches trigger and where the robot goes.
- Corner: put the robot in a corner and count how many bumps it takes to escape.
- Soft and glass obstacles: try a cushion and a glass door. Contact sensing should work where distance sensors fail.
- Thin obstacle: approach a chair leg between the whiskers. A gap in the coverage means the levers need to reach further across.
- Speed: raise
SPEEDslowly and note the speed at which the impact starts to push the robot off line or damage the lever.
What usually goes wrong
| Symptom | Likely cause | Fix |
|---|---|---|
| Switch never reads pressed | Wired to the wrong contact or lever not reaching | Use the normally-open contact, adjust the lever |
| Always reads pressed | Switch wired normally-closed, or a short to ground | Rewire, check for a pinched wire |
| Triggers randomly | Vibration on a loose lever or noise on long wires | Fix the switch firmly, shorten wires |
| Turns into the obstacle | Turn direction reversed | Swap the turn calls or motor leads |
| Bounces between two walls | No escape rule | Keep the repeated-bump escape turn |
| Whisker catches on things | Lever too long or angled badly | Shorten it and angle it outward |
Upgrades
- Add a distance sensor: use the bumpers as a last-resort layer under the ultrasonic scan in the obstacle avoiding robot.
- Rear bumper: add a third switch so the robot notices when it hits something while reversing.
- Interrupts: use the pins’ interrupts so a bump is noticed mid-turn.
- Random turns: vary the turn time slightly so the robot does not repeat the same path.
Cost and parts notes
The ₹1,350 total is an illustration for the parts above and does not include shipping. The L298N guide explains the voltage drop that makes a 7.4 V pack behave like a 5.8 V one at the motors. Use the cost calculator to compare sellers.
Common questions
Why use INPUT_PULLUP?
It turns on a resistor inside the Uno that holds the pin high, so the switch only has to connect the pin to ground. That saves two external resistors and a lot of wiring.
Why would I choose bump switches over an ultrasonic sensor?
Bump switches are cheap, need no calibration and work on glass, black and soft surfaces. They only detect an obstacle after touching it.
Can I read the switches with interrupts?
Yes, on D2 and D3 of the Uno. This build uses simple polling, which is easier to read and fast enough at low speed.
Will it hurt furniture?
At low speed and light weight, unlikely, but keep the speed down and test on a clear floor first.
Last reviewed: November 2026. This is a design worksheet with illustrative costs. It has not been bench-tested by this site; timings and speeds are starting values, and measurements from your build are welcome.