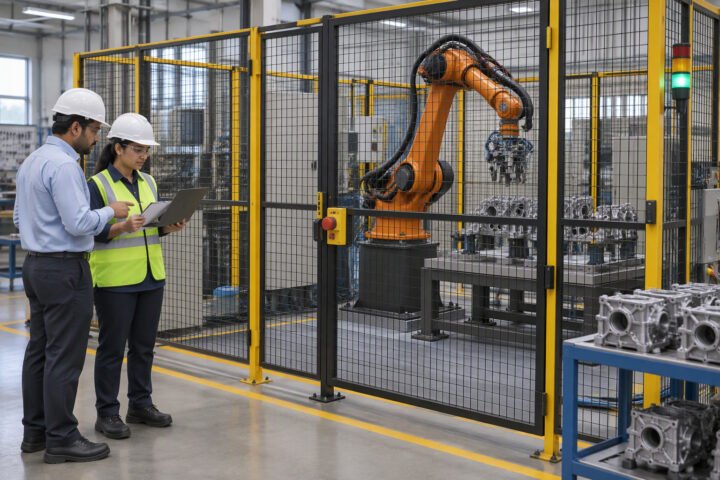
The robot repeats a weld; the fixture decides whether that weld lands in the same place every time. In most Indian welding cells, fixture design causes more rework than the robot does.
This guide covers locating principles, clamp choice, distortion control, access for the torch, and the fixture budget that makes a welding cell pay back.
Locate first, clamp second
A fixture has two jobs: put the part in a known position, and hold it there while heat tries to move it. These are different problems. Locators define position; clamps hold against the locators. A design that uses clamps as locators will produce parts that vary with operator strength and clamp wear.
The classic approach is 3-2-1: three locators on the primary plane, two on the secondary, one on the tertiary. For thin sheet metal, the number rises and the spacing matters more than the count, because the part deflects between supports.
Locator types and where each belongs
| Locator | Use | Trade-off |
|---|---|---|
| Fixed round pin | Primary hole location | Wear, part must lift on and off |
| Diamond pin | Secondary hole, avoids over-constraint | Only one orientation |
| Rest pad | Vertical support on a plane | Needs clean contact face |
| V-block | Cylindrical parts | Centre height depends on diameter |
| Magnetic or vacuum | Thin sheet, fast loading | Weak against welding heat and spatter |
Pin wear is the most common cause of drift in a fixture that was accurate at commissioning. Hardened pins and replaceable inserts cost a little more and save a rework campaign eighteen months later.
Clamping for welding heat
Welding shrinks metal as it cools. A clamp that holds rigidly against shrinkage builds stress into the part and distorts it when released. A clamp with the right force and the right location lets the joint move slightly while keeping the parts in contact.
- Toggle clamps are fast but force varies with adjustment and operator. Use for low-volume work with a setting gauge.
- Pneumatic clamps give repeatable force and can be interlocked with the robot. The default for production cells.
- Manual screw clamps hold well and load slowly. Acceptable for large fabricated parts with long cycle times.
- Magnetic clamps suit ferrous sheet but lose force as the part heats.
Clamp force should be enough to close the gap without crushing the section. For thin sheet, more force is not better; it flattens the flange and moves the weld line.
Distortion control that actually works
- Weld sequence: balance heat around the part rather than running one long seam.
- Backing bars or chill blocks to pull heat out of thin sections.
- Pre-setting the fixture with a slight counter-camber on parts that bow predictably.
- Tack welds in the fixture before the robot runs the full seam.
- Allow cooling in the fixture when the part is thin and the tolerance is tight.
None of these replace a proper weld procedure. They reduce the fixture’s contribution to variation so the welder’s settings can be judged on their own.
Torch access and robot reach
A fixture that holds the part perfectly but blocks the torch is a failed design. Check access at the extremes of the weld path, not just at the middle. The torch needs clearance for the nozzle, the shroud and the cable, plus room for the robot wrist to orient without collision.
Model the fixture and the robot together before cutting steel. Offline programming software makes this cheap; a physical trial makes it expensive. Pay particular attention to the approach angle: a 45-degree torch is far more forgiving than a vertical one in a tight corner.
Materials and build practice
| Element | Typical choice | Why |
|---|---|---|
| Base plate | 25–40 mm mild steel, stress relieved | Stiffness and stability under clamping |
| Locating pins | Hardened tool steel, replaceable | Wear life, quick replacement |
| Rest pads | Hardened and ground inserts | Flat, replaceable contact faces |
| Clamp bodies | Pneumatic toggle with position sensing | Repeatable force, robot interlock |
| Spatter protection | Copper or ceramic shields on exposed faces | Keeps locating faces clean |
Fixture cost in India
- Simple two-station fixture for a small bracket: ₹45,000 to ₹1.2 lakh.
- Pneumatic fixture with position sensing and robot interlock: ₹1.5 lakh to ₹4 lakh.
- Rotary or indexing fixture with servo positioning: ₹4 lakh to ₹12 lakh.
- Large fabricated frame with multiple stations: ₹8 lakh and above.
Fixture cost is often 20 to 40 percent of a welding cell, and it is the part most often cut during negotiation. Cutting it usually shows up as rework and as an operator who has to hammer parts into place.
Commissioning checks before production
- Load and unload the fixture ten times with the same part; measure position variation at the weld joint.
- Run a full seam and check distortion against the drawing after cooling.
- Verify clamp force with a gauge, not by feel.
- Confirm the robot can reach both ends of every seam at the specified torch angle.
- Check that spatter shields do not obstruct the torch or the part.
- Record baseline measurements so drift can be detected later.
For the robot side of the cell, see industrial robot welding cost in India. If you are choosing the arm itself, the robot selection guide covers reach, payload and repeatability, and our ISO 9283 explainer clarifies what the accuracy figures mean for a weld path.
Why does weld position drift even when the robot is repeatable?
Usually fixture wear or spatter on locating faces. The robot returns to the same point, but the part is not in the same place. Check pins, pads and clamp force before touching the program.
How many locators does a welding fixture need?
Three on the primary plane, two on the secondary and one on the tertiary is the starting point. Thin sheet needs more support to control deflection between locators.
Should I use pneumatic or manual clamps?
Pneumatic for production cells because force is repeatable and the clamp can be interlocked with the robot. Manual clamps are acceptable for low volume and long cycles.
How do I reduce welding distortion?
Balance the weld sequence, use chill blocks or backing bars, tack in the fixture, and let parts cool in the fixture when tolerances are tight.
What does a welding fixture cost in India?
A simple fixture runs ₹45,000 to ₹1.2 lakh, pneumatic fixtures ₹1.5 to ₹4 lakh, and servo indexing fixtures ₹4 to ₹12 lakh. It is typically 20 to 40 percent of the cell cost.
Laser welding is far less forgiving of fit-up, so the laser welding robot guide pairs well with this fixture advice.
Even a good fixture leaves small part-to-part variation, which is what seam tracking is there to absorb.
The fixture that holds the part during welding has to survive rotation, as explained in the positioner guide.
For spot welding the fixture must also back the panel rigidly, or electrode force deflects the sheet.
Sources and further reading
- ISO 10218-2 — robot system integration and safety requirements.
- American Welding Society — welding procedure and qualification standards.
- Indian Welding Society — Indian welding practice and training.
- ISO 15614 — welding procedure qualification by testing.