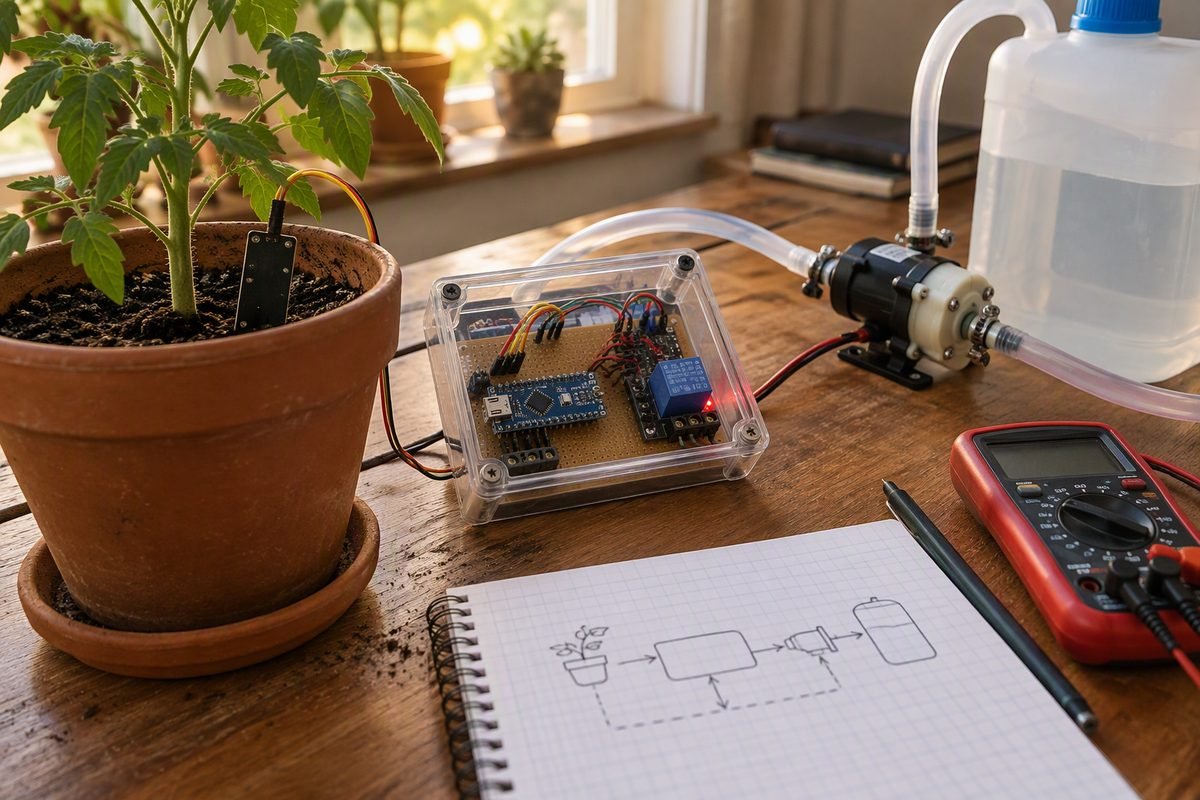
A working automatic plant watering system costs about ₹1,300 to ₹3,000 in India in October 2026: an Arduino Nano clone, a capacitive soil probe, a relay module, a small 12 V diaphragm pump, tubing, a reservoir and two power supplies. The mistake that ruins most student versions is treating the probe reading as a moisture percentage. A cheap probe reports a voltage that shifts with soil, water and temperature, so a copied threshold either drowns the plant or never waters it. Calibrate in the pot you are using and water in doses.
How the system decides to water
The controller never measures moisture. It measures how far the probe output has moved between two points you recorded: the pot at your watering point, D, and after a thorough watering, W. The dryness fraction is (R – W) / (D – W), where R is the current reading. It sits near 0 when wet and near 1 at your watering point. The formula works whether the output rises or falls with moisture, because both references come from the same probe and the sign cancels.
Watering until the probe reports wet over-waters: water spreads slowly, and the probe sits in a pocket that wets faster than the root ball.
- Measure. Power the probe, wait 200 ms, take nine readings 100 ms apart and keep the median.
- Normalise. Compute the fraction from R, D and W, stored as constants.
- Decide. Dose above 0.60 if the off-time has passed and no fault is latched; stop at 0.40.
- Dose. Relay on for a fixed time, starting at 5 seconds, capped by a maximum.
- Settle. Pump off for 15 to 30 minutes, then measure again.
- Check. If three doses fail to move the fraction by 0.05, raise FAULT: stop and show it.
Use millis() timestamps so the fault check runs while the pump is on; the 0.60, 0.40 and 0.05 values are choices to tune during the tests.
Bill of materials
These are Indian retail prices, not quotes. Suppliers are covered in where to buy robotics parts in India. Indicative retail bands, October 2026; confirm before ordering.
| Part | Qty | Indicative ₹ | Notes and alternatives |
|---|---|---|---|
| Arduino Nano V3 clone | 1 | 250 – 450 | An Uno clone at 450 – 800 is easier to wire. |
| Capacitive soil moisture sensor v1.2 | 1 | 130 – 350 | 3.3 to 5.5 V, analog output 0 to 3.0 V. Resistive types corrode. |
| 5 V relay module, 1 channel, 10 A | 1 | 60 – 150 | Active-low on most boards; optocoupler adds 20 – 40. |
| Mini diaphragm pump, 6 – 12 V DC | 1 | 180 – 450 | R385-style; check the datasheet for flow and lift. |
| Tubing, 4 – 6 mm inner diameter | 2 m | 50 – 120 | Match the pump outlet and clamp both ends. |
| Reservoir, 2 – 5 L | 1 | 0 – 200 | Reuse an opaque can with a lid. |
| 12 V 2 A adapter | 1 | 250 – 450 | Pump only. Size above the measured pump current. |
| 5 V USB adapter | 1 | 150 – 300 | Separate rail for the Nano. |
| Enclosure and cable gland | 1 | 100 – 300 | Shaded and splash-resistant. |
| Jumper wires, breadboard or perfboard | 1 set | 80 – 200 | Breadboard first, perfboard for submission. |
| 1N4007 diode and 100 nF capacitor | 1 each | 10 – 30 | Flyback protection across the pump. |
| Float switch (optional) | 1 | 150 – 350 | Plastic type; stainless units cost 1,000 or more. |
| 0.96 in I2C OLED (optional) | 1 | 180 – 350 | Shows the reading and fault state. |
The core build totals ₹1,300 to ₹3,000 with a Nano clone and ₹1,500 to ₹3,350 with an Uno. Options add ₹330 to ₹700, the same budget as the simpler builds in robots under ₹2,000.
Wiring and safety
Use two supplies and one ground. The 12 V adapter feeds the pump through the relay; the 5 V USB adapter feeds the Nano. Join both negatives to Arduino GND. One shared 5 V supply browns the board out at pump start.
- Probe: VCC to 5V, GND to GND, AOUT to A0.
- Relay: VCC to 5V, GND to GND, IN to D7. Test which level clicks before connecting the pump; most are active-low, and some clones are reversed.
- Contacts: 12 V positive to COM, NO to pump positive, pump negative to 12 V negative. The contacts isolate the 12 V pump circuit from the logic. Fit the 1N4007 across the pump, stripe on positive.
- Float switch: one lead to D2, the other to GND, with
INPUT_PULLUPenabled. - OLED: SDA to A4, SCL to A5.
- Fuse: 1 A inline on 12 V positive.
A 5 V pump straight from the board fails three ways. The UNO R3 datasheet rates each I/O pin at 40 mA DC; vendor listings put R385-style pumps at roughly 0.5 to 0.7 A with higher inrush. The 5 V pin is a regulated output for light loads, not a motor supply. And the pump’s back-EMF reaches the pin that drove it. Use the relay, or a logic-level MOSFET.
Keep the build on 12 V DC. Do not switch 230 V mains on a breadboard or an exposed hobby module. If the project needs a 230 V pump, an adult or qualified technician should handle the enclosure, earthing, RCCB and strain relief. Mount the electronics above the water line and add a drip loop.
Calibration that actually works
Calibrate the exact probe, in the exact pot, at its running depth. Tape the body so the depth repeats and place it between stem and pot wall.
For the dry reading, let the pot dry to the point where you would water by finger test, log nine readings and take the median as D. Do not use oven-dry soil. For the wet reading, water until it drains, wait 30 to 60 minutes, then log nine and take the median as W. A reading one minute after watering never recurs.
Put D and W in the sketch as constants. The pump starts at 60 percent of the range and stops inside 40 percent. If D and W come out almost identical, the probe is unplugged, the pin is wrong, or it is not seated in soil. Then run three days of tests, pump disconnected for the first two.
- Day 1, dry-down. Log the fraction every 30 minutes and check by finger morning and evening. Count false positives, where the sketch asked for water on damp soil.
- Day 2, wetting curve. Water by hand at a fixed time and log every 10 minutes for two hours. Time how long the fraction takes to fall below 0.40; that sets the settle time.
- Day 3, closed loop. Connect the pump, mark the reservoir and run 24 hours. Count doses, measure water used and confirm the intake never ran dry.
Record timestamp, raw ADC, fraction, decision, pump seconds, reservoir mark and an observation, plus the 5V rail voltage daily. Low-cost probes vary between units, a 2022 calibration study noted, so calibrate the one you install.
Five failure modes and the fix
1. Sensor corrosion
Resistive probes push DC through soil, so one electrode dissolves and readings drift within weeks; the 2022 study found they corrode and limit long-term use. Buy capacitive. If you must use resistive, power it from a digital pin only during the measurement, within the pin’s 20 mA limit.
2. Sunlight and heat drift
Direct sun heats the pot, soil and probe electronics, so the reading moves with no water added. Shade the enclosure and probe lead, and calibrate at the hour the system will run. If the dry reading shifts by more than about 0.1 between 2 pm and 8 pm, widen the dead band.
3. Pump priming
Air in the suction line means the pump runs and moves almost no water. Mount the pump at or below reservoir level, keep the suction line short, fit a non-return valve and prime with a syringe. Pump manuals warn that dry running damages the pump, so cap the dose time.
4. Silent empty reservoir
The pump runs, the serial monitor reports a dose, and the plant dies. Fit the float switch on D2 and enable the plausibility rule: three doses with no rise in the fraction means FAULT, so stop pumping and show it.
5. Relay chatter
When the fraction sits on the threshold, the relay cycles every few seconds and arcs its contacts. Hysteresis fixes most of it: water at 0.60, stop at 0.40, with a minimum 5 seconds on and 10 minutes off. A 100 nF and 100 ohm snubber across the contacts, or a MOSFET, handles the rest.
What to write in your report
Your test table needs these columns: test number, date and time, reference dry ADC, current ADC, fraction, decision, pump seconds, reservoir mark, observation.
For the block diagram, draw the probe feeding the sensor module, the module feeding the Arduino, the relay switching the pump, and the pump feeding the pot. Add the reservoir, supplies, and any float switch or OLED. One arrow from pot back to probe closes the loop.
Keep limitations specific, for example: “This prototype was tested in one 150 mm pot with one soil mix over three days. The probe was calibrated against two reference points, not gravimetric soil moisture. Temperature compensation, long-term drift and pump flow rate were not measured.” Adapt it to your build. The full structure is in our robotics project report format.
Upgrades worth doing
The float switch at ₹150 to ₹350 gives the best return because it turns the worst failure into a warning. Solar costs roughly ₹2,000 to ₹4,500 for a panel, a PWM controller and a 12 V battery. Size it from measured energy: watt-hours per day is pump amps times 12 V times pump seconds per day, divided by 3600.
An ESP32 DevKit at ₹350 to ₹450 can replace the Nano and publish readings over Wi-Fi. Its ADC is 12-bit at 3.3 V, so record D and W again. For the underlying skills, work through Arduino projects for beginners and the learning path.
Frequently asked questions
How much does an automatic plant watering system cost in India?
A one-pot build with a Nano clone, capacitive probe, relay module, diaphragm pump, tubing and two adapters costs about ₹1,300 to ₹3,000 at October 2026 retail bands. A float switch and OLED add ₹330 to ₹700. Confirm prices before ordering online.
Can an Arduino run a 5 V water pump directly?
No. An I/O pin is rated for 40 mA DC on the UNO R3, while these pumps draw several hundred milliamps and more at start-up. Back-EMF can also damage the pin. Switch the pump through a relay or logic-level MOSFET, on its own supply with a shared ground.
Capacitive or resistive soil moisture sensor?
Capacitive, for anything beyond a demo. It has no exposed electrodes, so it avoids the electrolytic corrosion that shortens a resistive probe's life. It costs ₹130 to ₹350 against ₹50 to ₹100 for resistive, and still needs calibration in your own pot.
How long should the pump run each time?
Start with 5 seconds, wait 15 to 30 minutes, then measure again. Increase the dose only if the fraction barely moves after three doses. The right dose depends on pot size, soil and pump, so measure the water delivered with a cup.
Why does the pump run but no water reaches the pot?
Usually air in the suction line, a reservoir level below the pump intake, a kinked tube or a blocked outlet. Mount the pump at or below water level, prime the line and fit a non-return valve. If it ran dry for long, check the pump datasheet.
Related reading: Arduino projects for beginners in India · Robot safety relay wiring · Soldering for robotics beginners · Final year robotics projects.
Sources
- Arduino UNO R3 datasheet, A000066
- DFRobot capacitive soil moisture sensor, SEN0193
- Probots 1 channel relay 5V
- Robu isolated 5V relay module
- ThinkRobotics capacitive soil moisture sensor
- Robu R385 mini water pump
- Chowdhury, Sen and Janardhanan, 2022, low-cost soil moisture sensor calibration
- Jabsco self-priming pump instructions