A conveyor buying checklist for an automation line starts with the product: its size, weight and pitch decide belt width, speed and drive. Then check guarding and stops, sensor positions, how the conveyor talks to your controller, and whether it fits the floor.
Key takeaways
- Conveyor throughput in parts per minute equals belt speed divided by the distance between parts (the pitch).
- A conveyor is a machine with pinch and trap points, so guarding and emergency stops are part of the purchase, not an extra.
- Define the sensor and stop positions on paper before you order, because moving a bracket later is easy but changing the belt length is not.
- Check how the drive is controlled (fixed speed, variable frequency drive or servo) and how it connects to your PLC or robot.
Conveyor Belt Width and Speed for an Automation Line
Belt width is the usable carrying width and belt speed is how fast the surface moves. Both come from the product size and the throughput you need.
Start with the largest product you will carry, add side clearance for guides, and check the weight per metre against the belt and frame rating in the datasheet. For speed, use the pitch relationship: parts per minute equals belt speed in metres per minute divided by pitch in metres.
Worked example with assumed numbers: belt speed 0.2 m/s and a part pitch of 0.3 m. Belt speed per minute is 0.2 times 60, which is 12 m/min. Parts per minute is 12 divided by 0.3, which is 40 parts per minute. Check by another route: 0.2 m/s divided by 0.3 m is 0.667 parts per second, and 0.667 times 60 is 40. Add a margin, because robots and sensors rarely run at 100 percent of the nominal rate.
Pick the speed so a robot or operator has enough time to pick or process each part. For a robot picking from a moving belt, see the conveyor integration for robot cells guide for tracking and timing ideas.
Drive and Gearbox
The drive is the motor, gearbox and controller that move the belt. It must supply enough torque to start the loaded belt and hold the speed you need.
- Check the motor power and gearbox ratio the maker specifies for your load and belt length, rather than selecting a motor by size alone.
- A fixed-speed motor is simple. A variable frequency drive (VFD) lets you adjust speed and soft-start. A servo drive allows indexing and precise positioning.
- Check start and stop behaviour. Loads that slip or tip on sudden starts need a ramp.
- Look at the gearbox type, the mounting side and the oil or sealed-for-life details, as these decide the service routine.
- If you need to measure belt speed or distance, a pulse feedback from an encoder or sensor is common; the learning projects on speed measurement below show the idea.
Do not do mains or drive wiring yourself unless you are qualified. Use a licensed electrician for supply and motor connections.
Guarding and Stops
Guarding means physical barriers and stop devices that protect people from moving parts. A conveyor has in-running nips, drive shafts and sometimes falling products, all of which need protection.
- Check the supplier fits covers over drive and return rollers, and nip guards where the belt meets a roller.
- Add emergency stop devices where operators can reach: pull cords along the run or buttons at stations.
- Decide how the conveyor stops with the robot cell: shared stop circuit, or its own. Ask your integrator.
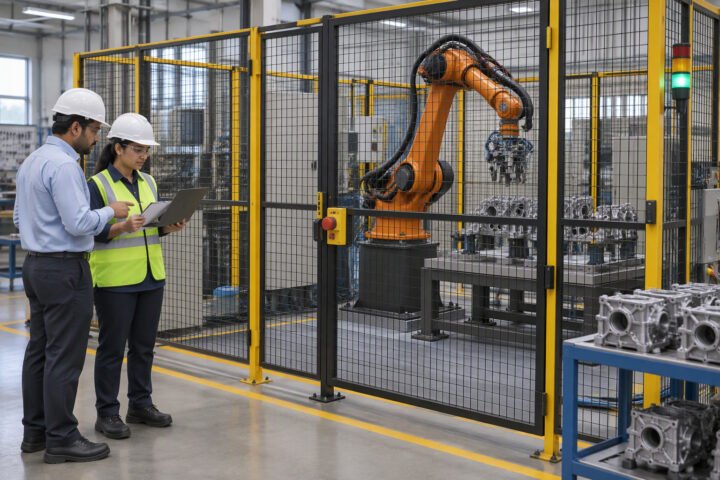
- Guard the transfer points where the conveyor enters the cell fence, so the opening does not give access to the robot.
This is general guidance, not a substitute for the applicable standard or a qualified safety engineer. See the robot integration checklist for how conveyors fit the cell’s safety plan.
Sensors and Stations
Sensors and stations are the detection and work points along the conveyor. Decide them early because they set the frame layout.
- Photoelectric sensors detect presence at a stop or pick position; check the beam type against shiny or transparent products.
- Hard stops or pneumatic stoppers hold a part at a station. Check they suit the part weight and speed.
- Leave mounting slots on the frame for sensor brackets, and spare ones for later changes.
- Add a sensor for jam detection at transfer points, so the line can stop before products pile up.
- If you need to know belt speed, an IR-pulse tachometer is a simple way to see the idea, as shown in the digital tachometer project.
Controls Integration
Controls integration is how the conveyor drive and sensors connect to the line controller. Settle this before purchase, or you may buy a conveyor your PLC cannot talk to.
- Ask which signals are wired: run, stop, fault, speed reference and sensor inputs.
- Check the supply voltages of the drive and the sensors, and whether they match your control panel.
- If the drive uses a fieldbus such as PROFINET or Modbus, confirm your PLC supports it.
- Decide who owns the program for start-stop sequencing: the conveyor maker, the integrator or you.
- For motion control with feedback, the principles in a small closed-loop speed build shows how closed-loop speed works on a small scale.
Site Layout
Site layout is how the conveyor fits the floor, the robot and the people around it. Mark it with tape before you order.
- Measure the available length, height and turning space, and allow service access on both sides.
- Check floor levelness and the load path if the conveyor carries heavy goods.
- Plan where power, air and network cables will run, and keep them clear of walkways.
- Check how products enter and leave, and whether the conveyor connects to other lines or a warehouse flow. The warehouse robotics in India overview shows typical flows.
How to check this yourself
- Measure your largest and smallest product and their weight, and compare with the belt width and rated load per metre in the datasheet.
- Calculate parts per minute from belt speed and pitch, as in the worked example, and add a margin.
- Walk the proposed layout with a tape, marking guards, stops, sensors and service gaps.
- Write the signal list between conveyor and controller and check each voltage and protocol against your panel.
- On delivery, run the empty conveyor and test each stop device before loading any product.
Common mistakes
- Choosing belt speed from a catalogue figure without calculating throughput.
- Treating guarding and emergency stops as optional extras.
- Ordering without checking the drive’s control signals against the PLC.
- Leaving no service access along the frame.
- Ignoring jams and transfer points where parts pile up.
Quick checklist
- Product size, weight and pitch written down.
- Throughput calculated and speed margin added.
- Drive type, gearbox and start behaviour confirmed.
- Guards, nip points and emergency stops specified.
- Sensor, stop and signal list agreed with the controls team.
Frequently asked questions
How do I calculate conveyor speed for a required output?
Divide the parts you need per minute into the belt speed per minute: belt speed in metres per minute equals parts per minute times the pitch in metres. For example, 40 parts per minute at a 0.3 m pitch needs 12 m/min, or 0.2 m/s. Add a margin for stops and starts.
Do I need a VFD for a conveyor?
Not always. A fixed-speed motor is enough when the line speed never changes. A variable frequency drive helps when you need to adjust speed, soft-start fragile products or match other machines. Check what the line needs, and ask a qualified electrician to wire the drive safely.
Who is responsible for conveyor safety guarding?
Responsibility depends on the contract, so write it down. Usually the conveyor maker supplies the standard covers and nip guards, while the integrator handles cell fences, interlocks and the shared stop circuit. Confirm the split before purchase, and have a qualified engineer review the final installation.
Related reading
- Automation hub, for the surrounding line topics.
- PID motor speed control with encoder, a build for holding a set speed.
- Wheel speed and RPM calculator, for turning roller diameter and RPM into belt speed.
About the author and how this is kept accurate
Written, checked and maintained by Jignesh Panchal of Jaadu Digital. Figures in worked examples come from the stated assumptions, not from a bench test of our own. Read the editorial standard, follow the author on LinkedIn, or send a correction. Last reviewed: November 2026.